| Home | Welcome | What's New | Site Map | Glossary | Weather Doctor Amazon Store | Book Store | Accolades | Email Us |
 | ||||||||||||||
Aids To Weather PhotographyIn the accompanying article (Photographing The Weather), I wrote in general about photographing the weather using film or digital cameras, but did not get into any technical details on what can be used to assist in taking and then producing images worth showing. In this brief piece, I will mention several aids that I have used in my weather photography. It is by no means all inclusive. I take photographs for a variety of reasons, but it is not my profession; therefore, I am not current with all the latest technology. I look at this discussion more to give the reader ideas for improving their weather photography using common and often inexpensive equipment.
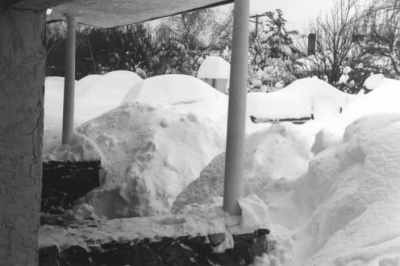
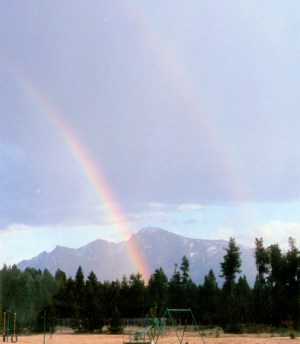
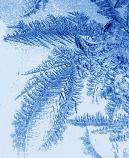
In researching this and the accompanying essay, I came across numerous websites that provided technical information for use in weather photography including specific techniques for photographing particular phenomena such as lightning and rainbows. One of the best sites I found and recommend is Harald Edens' Photography techniques . In it, Edens provides a number of essays on equipment including his views on which camera (digital or film) is best to use for photographing various weather phenomena. For example, he prefers film over digital for lightning photography, and slide film over print film when using a film camera. In the accompanying article, I mentioned using closeup photography to look at the small aspects of weather by taking closer looks at objects within the range of a hand's length, 20-25 cm (4-10 inches); objects focused from one centimetre to 20 cm (half inch to 4 inches); and the microscopic field of objects much smaller than a centimetre (half inch). Some of the available digital cameras are capable of focusing down to the single-centimetre range. Single-lens reflex (SLR) film cameras usually require special lenses or extension tubes to focus at such close distances. For the microscopic world, special equipment is necessary. (Edens discusses closeup photography in an essay entitled Macro photography. He is perhaps more correct using macro from the photographer's terminology. To me a meteorologist, however, macro means "big"; micro means "small.") Telephoto and zoom lenses allow photographers to enlarge specific aspects of the scene before them, such as a distant tornado, or to compose the picture so that the desired image is captured in more detail. Although these refinements can often be accomplished in post-production of the image by enlarging and cropping, it is frequently at the cost of image clarity. I find my camera zoom invaluable in weather photograph, even for cloudscapes. 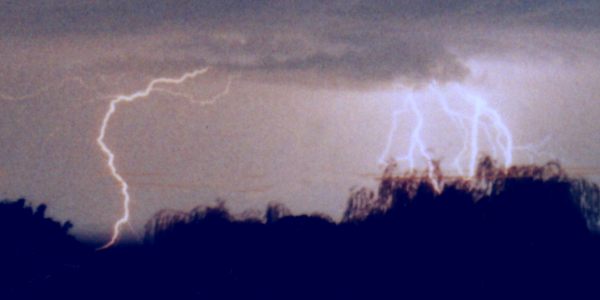 Tripods to hold the camera steady are critical in some weather photography and very useful in others. They are particularly critical when photographing lightning or other dark-lighting phenomena such as auroras and lunar halos where long exposure time is required. Closeup work can also benefit from use of a tripod to provide a crisp image free from photographer movements. Except for long-shutter speeds where I feel a tripod is absolutely necessary, the use of a tripod may depend on the steadiness of your hand. Similarly, the use of a remote shutter release or timed release-delay can help reduce camera shake when mounted on the tripod. Filters placed over the camera lens often can improve the resulting image. The most dramatic for me in both color and black and white (more correctly termed grey-scale) is the polarizing filter which can be rotated to produce the best image. This filter cuts out portions of the scattered light coming to the camera and thus enhances the contrast or color in the image. While I have often used such a filter to enhance the drama of cumulonimbus cloud tops, it can also bring out the color in a rainbow � but be careful since it can also erase the rainbow's image. If you do not have a polarizing filter or your camera cannot add one, you can use the lens of polarizing sunglasses by holding the lens before the camera and rotating it to find the best image.
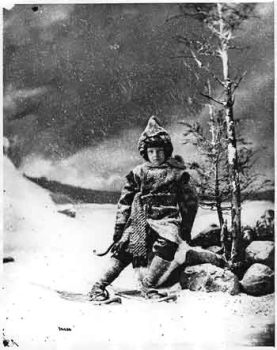
The impacts on an image similar to using colored filters can be added in post-production if you do your own darkroom work or by using one of the many available software programs for digital images. (Film images can be scanned into a computer for further creative work.) You will get a lot of arguments over the use of computer software in adjusting photographs, mostly from so-called purists who cling to old technologies, indeed some will demean the use of digital cameras as "cheating." But as Ansel Adams believed: "The negative is the equivalent of the composer's score, and the print the performance." To me, that says the taking of the picture is the first step in the artistic process and the final image released for public viewing often requires additional steps to bring out the beauty. These can vary from simply cropping the image to remove distracting elements, degrading the sharpness of an image to produce an abstract or impressionistic picture, altering the color balance, and adjusting the brightness/contrast to bring out the desired details. As Adams said, "Dodging and burning are steps to take care of mistakes God made in establishing tonal relationships." If your goal is more art than journalism, more manipulation can be used including combining images to produce an appealing composition. And don't think that this is a new digital-age concept — computers have just taken the drudgery out of the process and left more time for creativity. In the later decades of the 19th Century. Canadian photographer William Notman often used the creative construction of several photographs to produce his final image. Notman become one of the most sought after commercial photographers of his time and franchised his studio into the United States.
Learn More From These Relevant Books
|
||||||||||||||
 |
To Purchase Notecard, |
Order Today from Amazon! | |
 |
 |
To Order in Canada: |
To Order in Canada: |


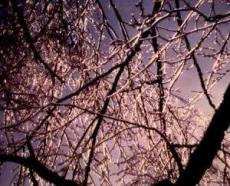
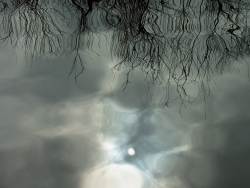
 Colored filters may be used to bring out details or produce striking images of sky scenes. They work best with black and white photography by removing certain wavelengths of light. With color images, colored filters alter the overall color which changes the image completely. This might produce an interesting mood to the picture that was not present in reality.